🌐 Building Web Apps - Create Your Own Platform Experience!
Welcome to the world of web applications in Dataloop! Here's where you'll learn to create beautiful, interactive web experiences that seamlessly integrate with our platform. Let's build something amazing! ✨
⚡ Quick Start Guide
- 🎨 Create a client-side app using your favorite framework (we ❤️ Vue.js!)
- 📜 Serve your magical
dataloop.jsonmanifest at your app's root - 🔒 Host your app locally on
local.dataloop.aiwith HTTPS - 🎯 Add your app as a debug app in the Application Hub
- 🧪 Test your creation in its intended panel type
- 🔍 Debug using browser dev tools
🏗️ Building Your Web Application
🎨 Choosing Your Framework
While you can use any modern framework (React, Angular, etc.), we especially love Vue.js because:
- 🎯 We provide a Vue-based design system matching our platform theme
- 🎨 We offer ready-to-use UI components
- 🔧 We maintain open-source Vue.js libraries and icons
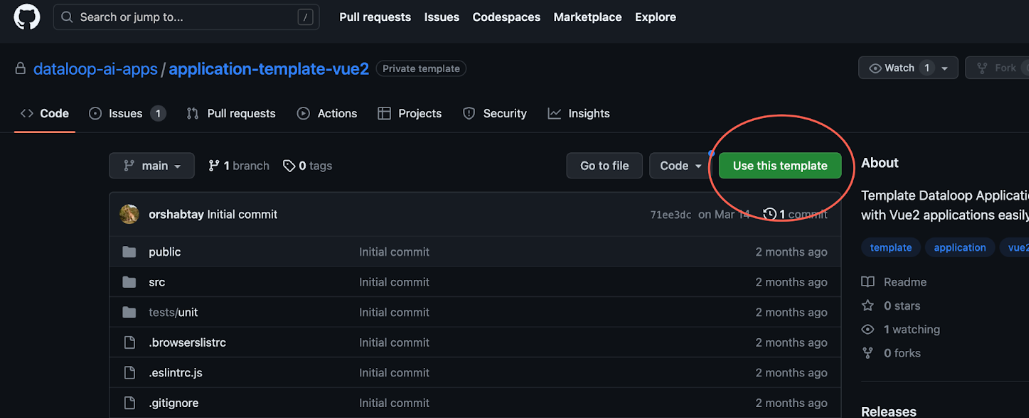
🚀 Quick Start Template
Want to jumpstart your development? Check out our example application!
🛠️ Local Development Setup
🔧 Essential Configurations
Configure Local Domain
# Add to your hosts file (/etc/hosts or C:\Windows\System32\drivers\etc\hosts)
127.0.0.1 local.dataloop.ai
Development Requirements
- 🔒 HTTPS enabled
- 🌐 CORS configured
- 🎯 Windows: Serve on "0.0.0.0"
- 📜 Public
dataloop.jsonat app root - 👤 Developer role access
- 📚 Familiarity with our JS SDK
🎮 Creating Your First App
Project Setup
# Install dependencies
npm i

# Start development server
npm run serve
Access Your App
- Open https://local.dataloop.ai:8080
- If you see "Not Private" warning:
- Click "Proceed to local.dataloop.ai" or
- Type "thisisunsafe"
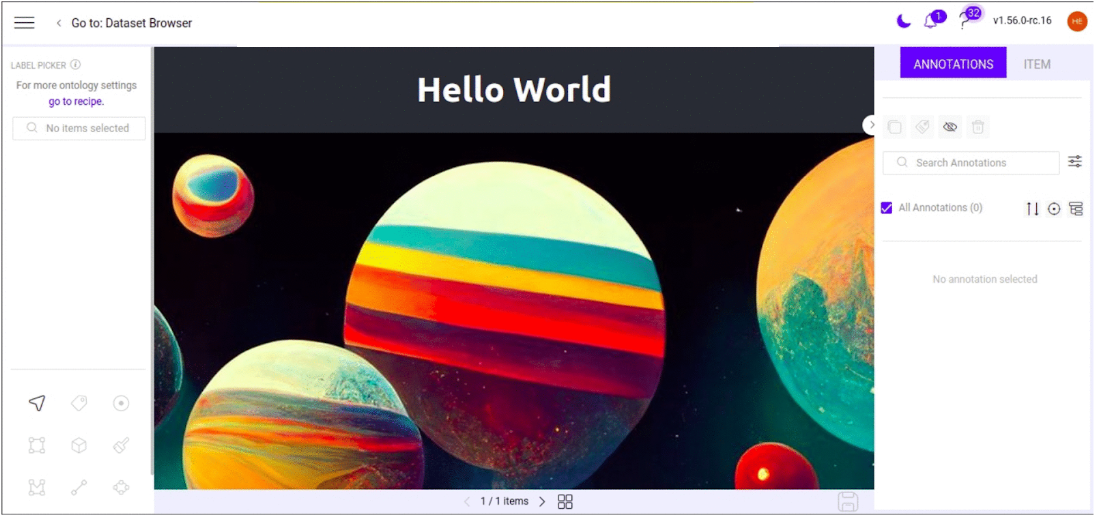
💻 Building an Item Viewer
Let's create a magical item viewer using our JS SDK! Here's how to bring your items to life:
🔮 Initialize SDK & Load Item
// App.vue
export default {
  methods: {
    async getItemDetails() {
      // Get the current item
      this.item = await this.dl.items.get()
      // Get item stream for display
      this.stream = await this.dl.items.stream(this.item?.stream)
    }
  }
}
🎨 Display Your Item
<!-- Show the item with style -->
<img
  v-if="item && stream"
  :src="stream"
  :width="itemWidth"
  :height="itemHeight"
/>
🐞 Debug Mode in Platform
🎯 Adding Your Debug App
Navigate to Application Hub > Developer tab
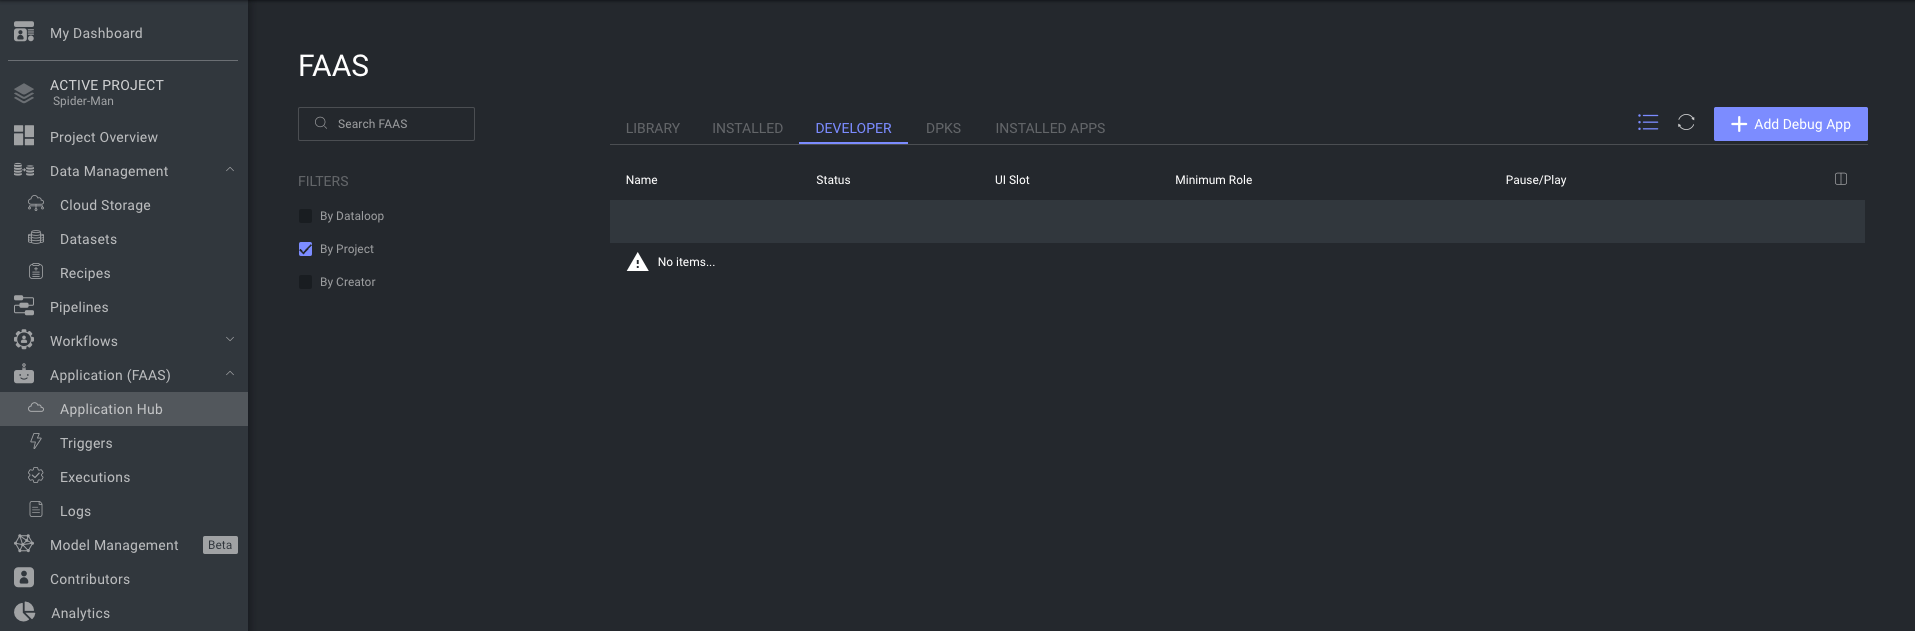
Click Add Function
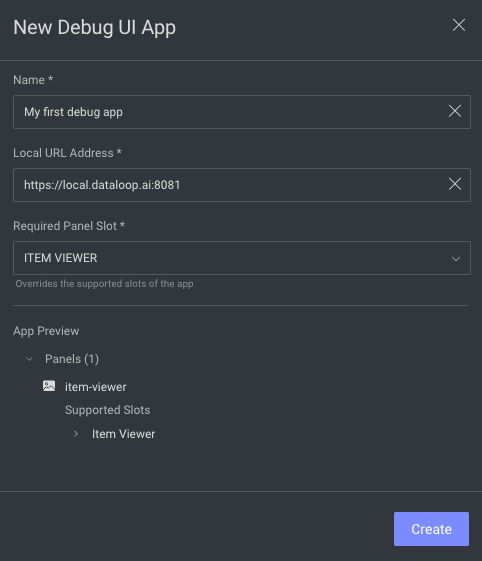
Configure Your App:
- Name your creation
- Choose main slot (e.g., Item Viewer)
- Enter your local URL
Test Your App:
- Go to dataset browser
- Right-click an item
- Choose "Open With..." > Your App

🧪 Testing Your Creation
🔍 Local Testing Setup
We provide powerful tools for testing your app locally:
DlMockDriver
import { DlMockDriver } from '@dataloop/jssdk'

const data = require('./snapshot.json')
global.window.dl = new DlMockDriver(data)
Debug Snapshot Feature
- Add your debug app to platform
- Click Debug Snapshot icon (or Alt+Shift+S)
- Save snapshot to tests directory
- Use in your test setup
🎨 Complete Item Viewer Example
Want to see a production-ready example? Check out our item-viewer repository!
💡 Pro Tips
- 🔍 Use browser dev tools for debugging
- 📝 Keep your manifest up to date
- 🧪 Test across different browsers
- 🔒 Follow security best practices
- 📚 Document your configuration
🚀 Next Steps
Ready to create your own web application? Here's your checklist:
- 📚 Choose your framework
- 🛠️ Set up local development
- 🔧 Configure your manifest
- 🎨 Build your interface
- 🧪 Test thoroughly
- 🚀 Deploy and share!
Need inspiration? Visit our example apps or join our developer community! ✨